Start with a ponytail
The first step in any fishtail braid adventure is to gather all the supplies. All you can go overboard with hairspray, bobby pins, and conditioning oil, all you really need to start is some hair, hands, a mirror, and a brush.

First, brush your hair to one side – whether you choose the right or left side is totally up to you and doesn’t matter that much. If your hair isn’t quite long enough to dangle over your shoulders, consider combing a small section in the front. This can help build up your skills and give you practice.
Create two sections
Continue running the brush through your hair to create the perfect ponytail. If it’s starting to hurt
because you have lots of knots in your hair, consider going slower to gently even out the knots with the comb. Or, you can try to manually separate any tangles with your hands.
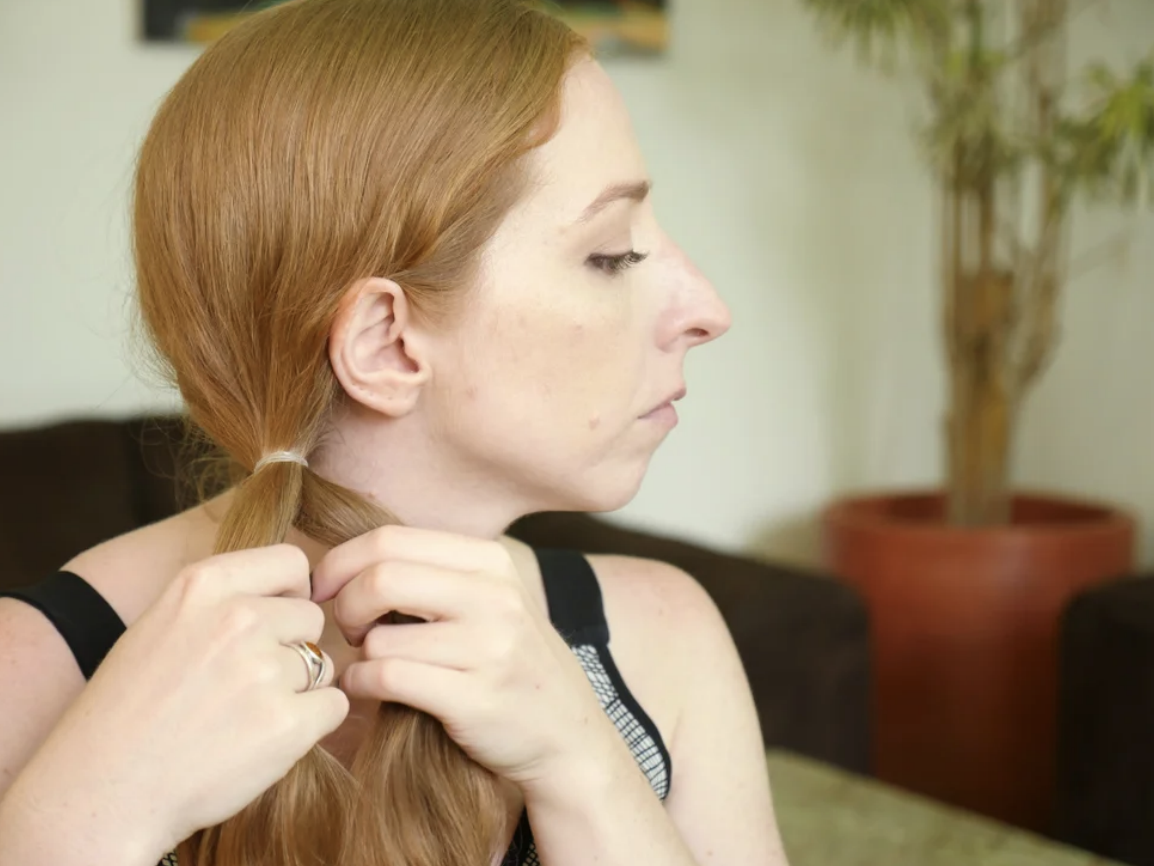
If it’s hard to see the tangled knots of hair, consider moving over to a mirror to get a better view of where the trouble lies. When your hair is smoothly brushed to one side, divide up the single ponytail into two main sections. They should be roughly the same thickness.
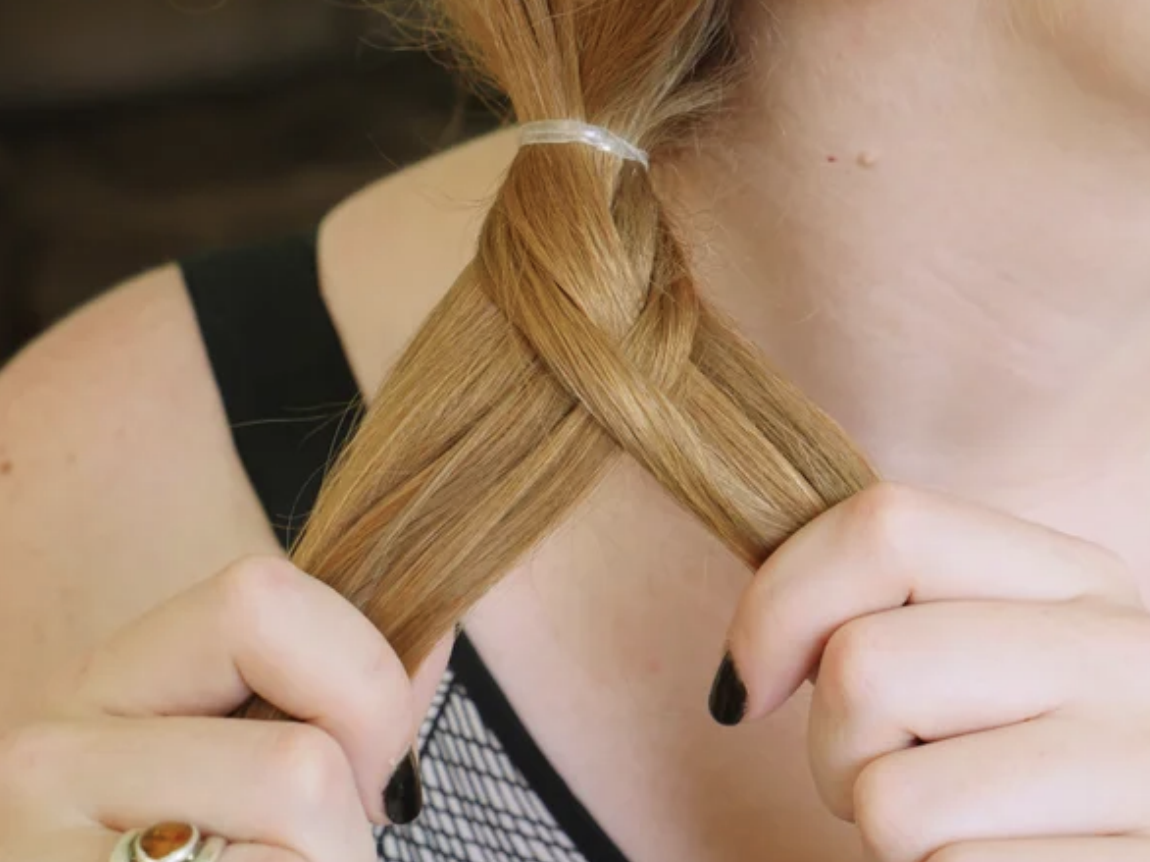
Separate out a smaller section
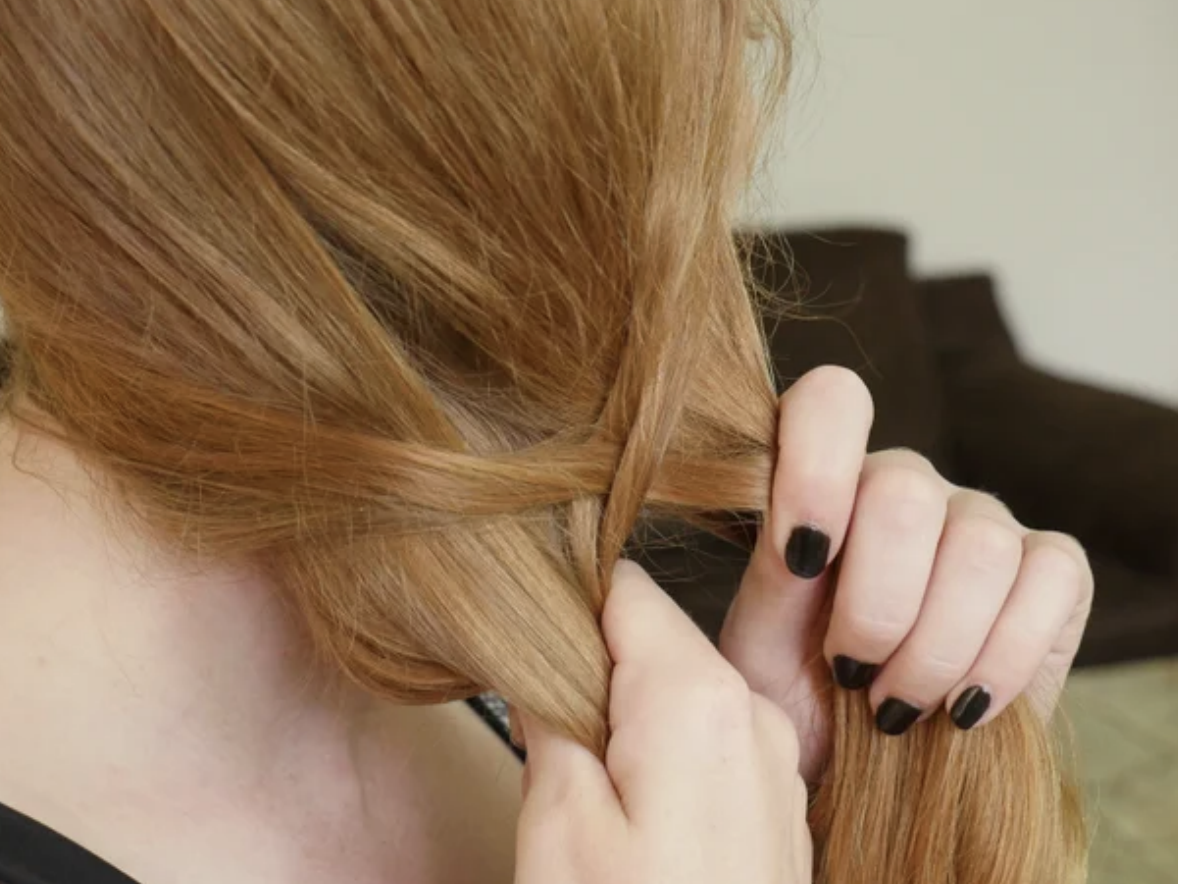
Now you should have two sections of hair at roughly the same thickness and length. The next step is to grab the outside of one of the halves and separate out a small bit of hair. Ideally, the separate section is the size of a pencil’s diameter – that is, the length from one side to the other.
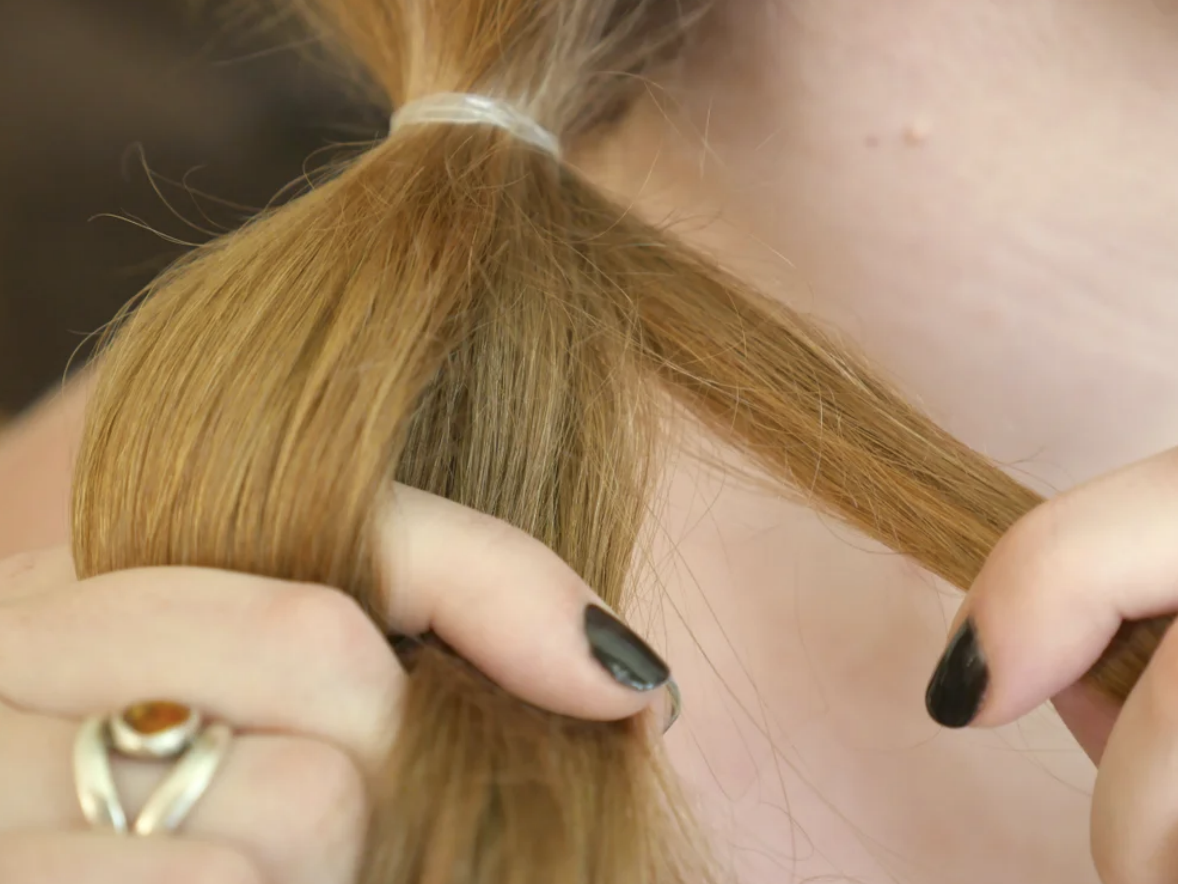
Then, take that smaller section and cross it over the section you just took it from. Take a look at the above picture to see it in action. After crossing over the smaller section, make sure to incorporate it properly.
Repeat on the other side
Once you finish separating out a small section and crossing it over on one side, it’s time to do the exact same thing on the other side. So, separate out a small section – roughly the size of a pencil in diameter – from the outer side of the other half. Then, take that section and weave it into the larger section.
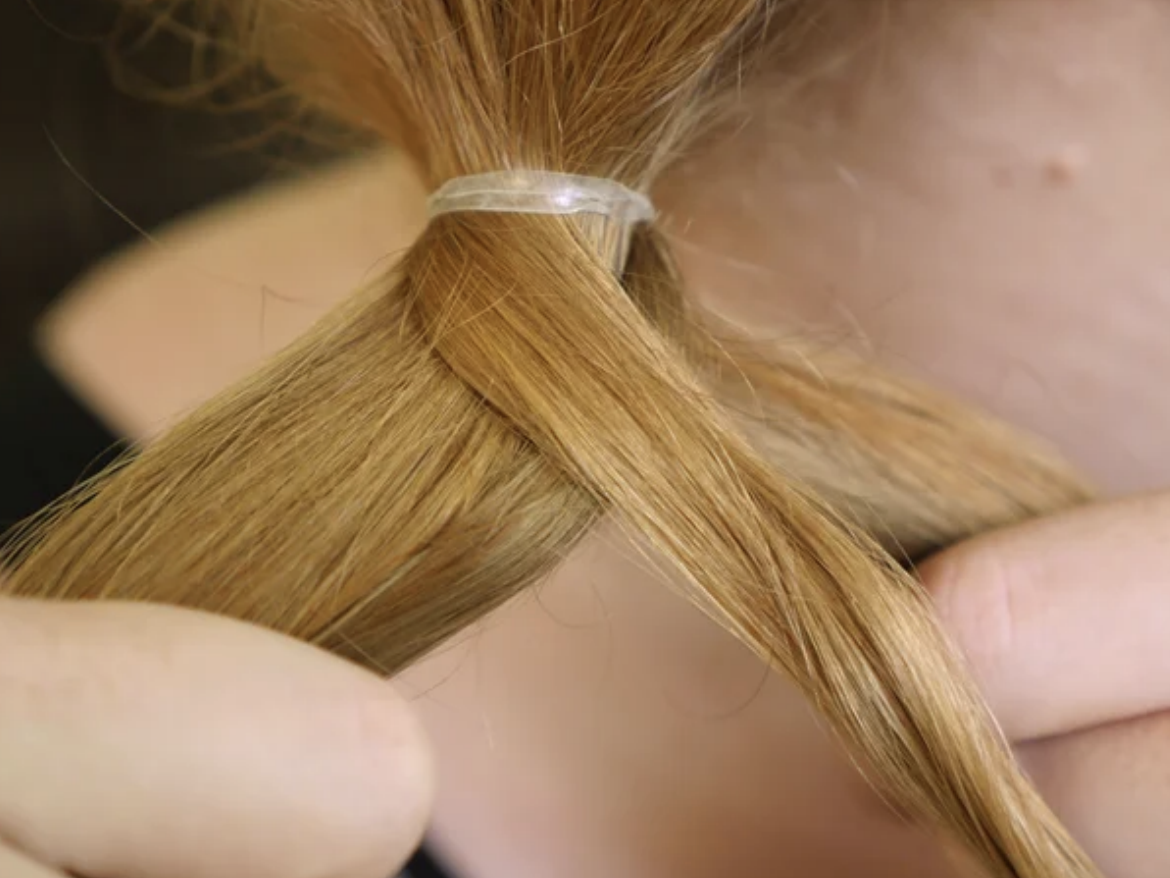
This will help to incorporate it into the first braid. Then, smooth out the sections with a brush or by hand. Now, take a brief mental break to congratulate yourself on getting a hold of the basics.
If you’re having trouble, try again.
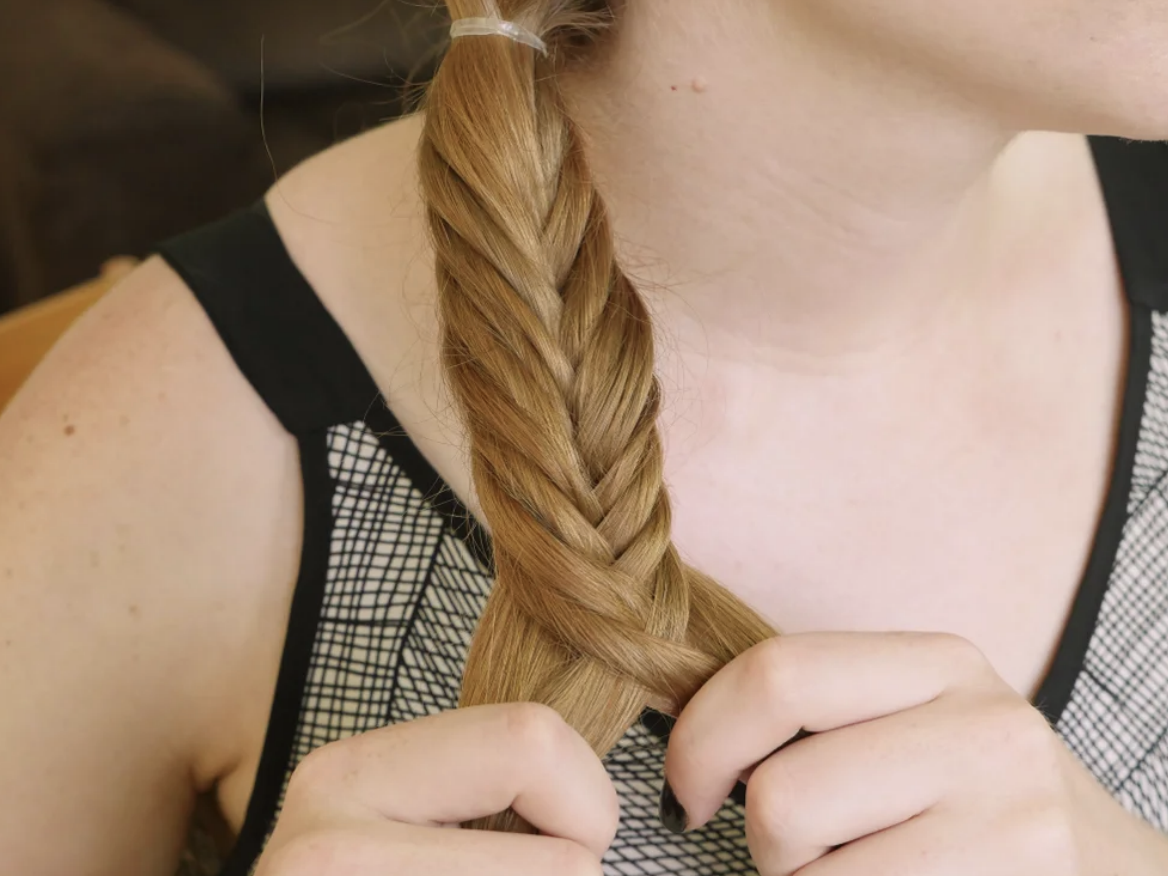
Return to the first braid
Once you get the hang of the basics, it’s time to continue the process of making the full fishtail braid. This mostly involves repeating what you just did. So, separate out a small section from the outer edge of the first braid. Then, cross it over the middle section of the other side.
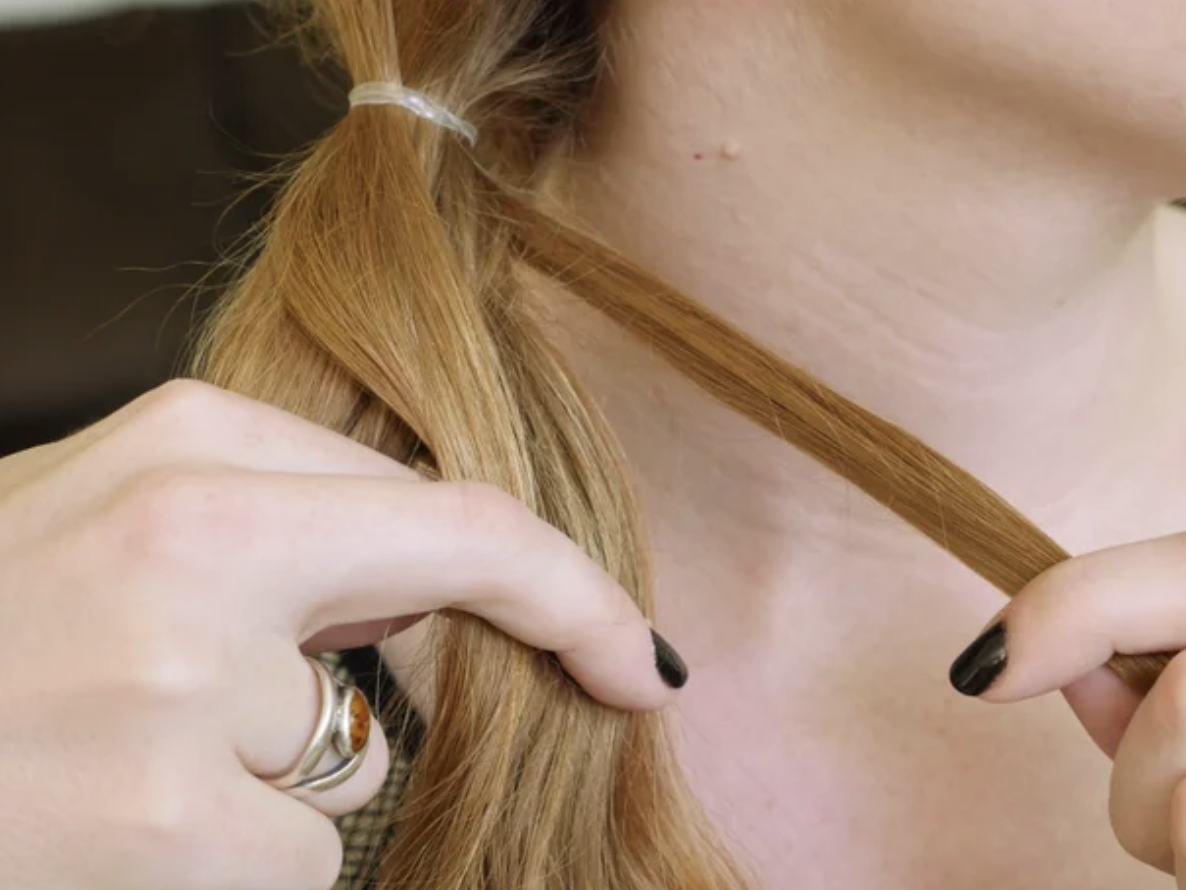
Finally, incorporate that new piece into the other half. This may take a few tries to get correct. It can help to take a look at the photo above and try to match it.
Repeat on the second side
As you might have guessed, the next step is to repeat that movement on the other side.
Hopefully, by now, you’re getting a good sense of the overall pattern that’s being created. If not, that’s ok too – it will come eventually! As the old saying goes, practice makes perfect.
Create a small section of hair from the larger strand, cross that section over to the opposite side, and incorporate it into its new little home. If you have a mirror nearby, you can start to imagine what it will look like once done.
Continue braiding each side
Once you finish with the left-hand section of hair, move on to the right-hand section. Each time, pull out a small section from each larger strand, cross it over the middle section, and incorporate it into the opposite side. Alternate in this way until you use up most of your hair.
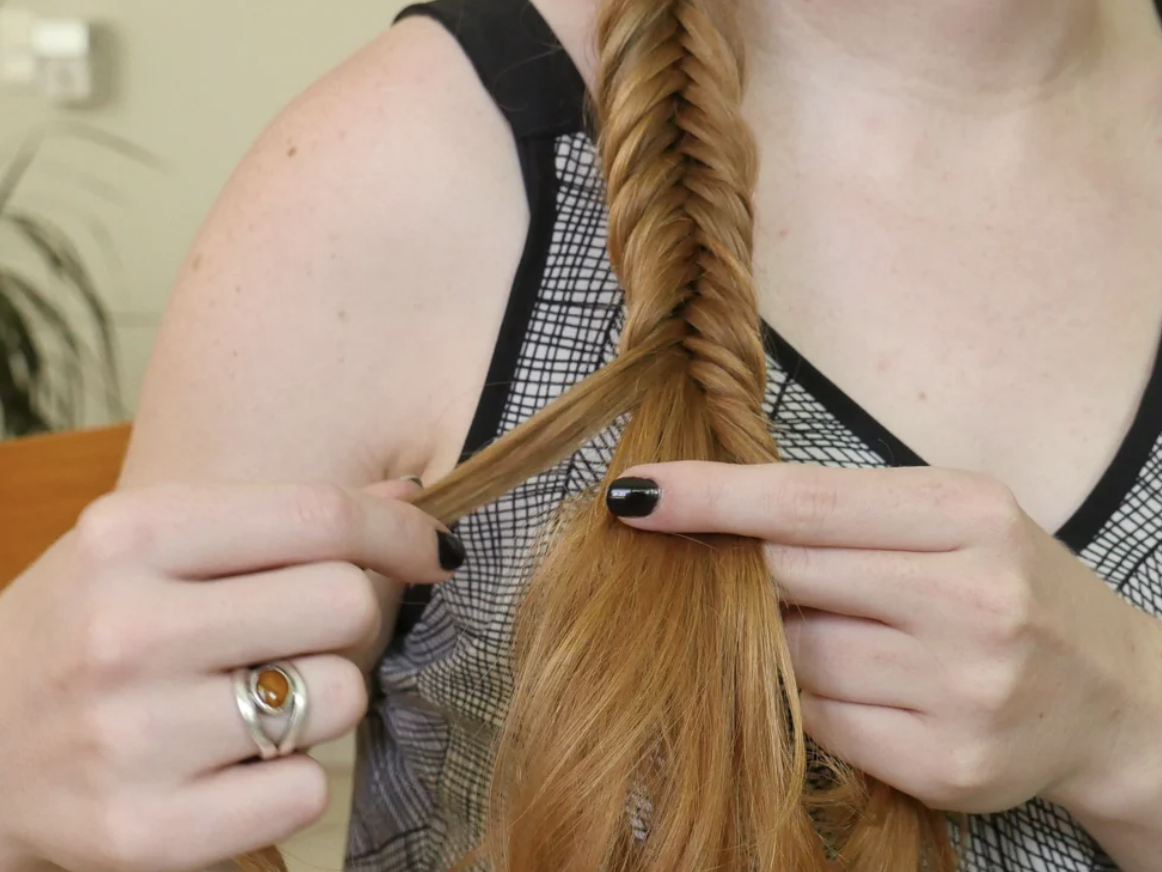
Since this is more of an art than a science, there’s no exact point you should stop at. However, most people stop a few inches before the end of their hair. Once you find the right spot, attach a small elastic to keep the braid in place.
Finishing touches
With the small elastic at the bottom, you’re almost finished. By now, you should have a nice long braid that can stand on its own. The exact length depends on the length of your hair, of course.
The last step involves giving the fishtail a fuller appearance.
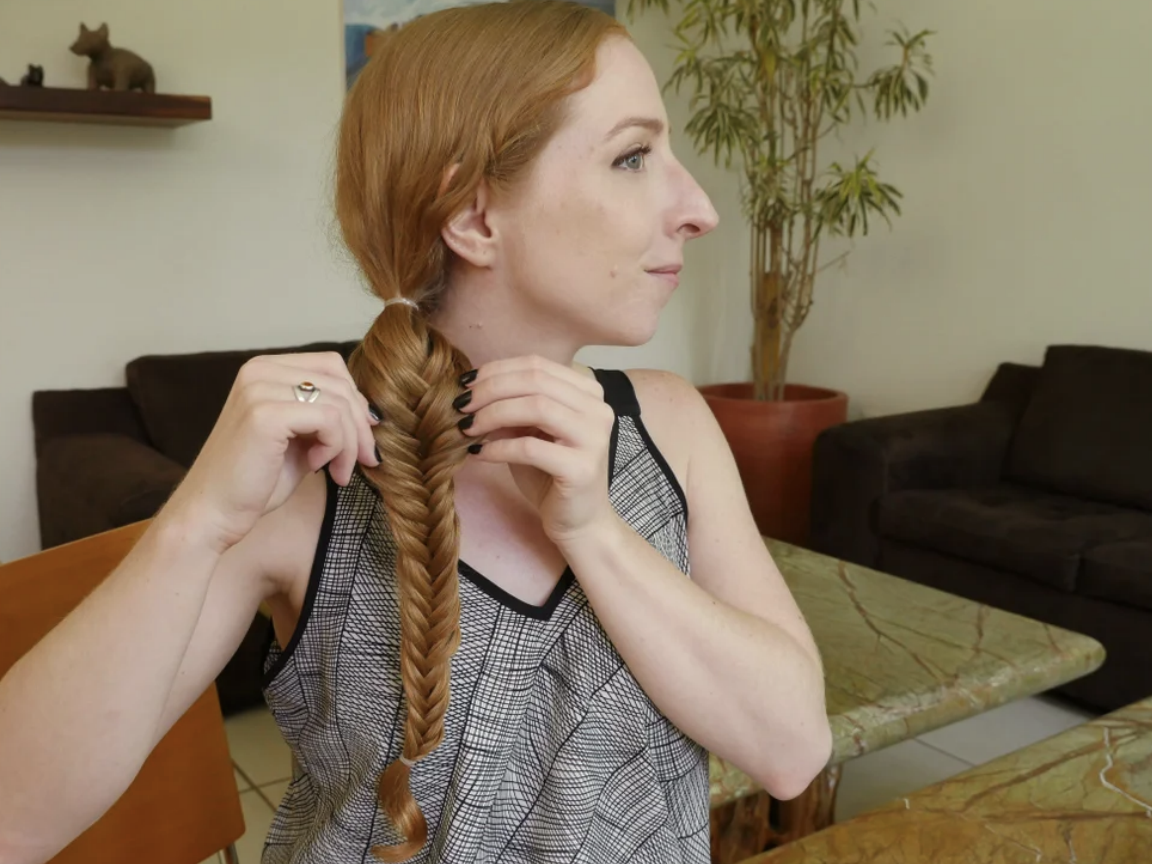
This is simple enough. All you have to do is start at the top and gently pull apart each braid. Place one hand on each side and lightly tug outwards. Once you make it to the bottom, your fishtail braid should have a much fuller appearance.
Starting the fishtail without a ponytail
The above steps describe the basic approach to creating fishtail braids. It starts with a ponytail
and moves on from there. However, starting with a ponytail isn’t always necessary. If you’d like
to try something else, simply divide up your hair into two sections.
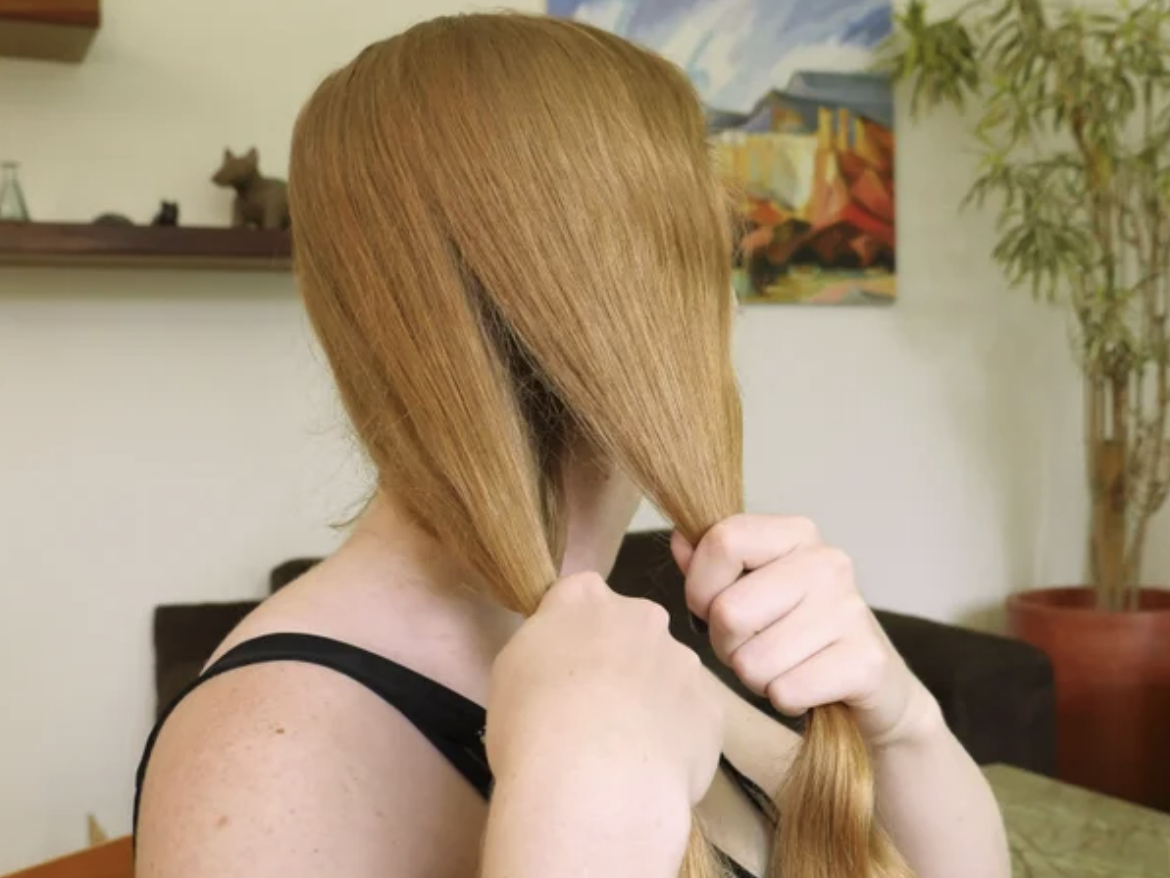
As you can see above, it’s important to make the two sections relatively even. After that, separate out a small section of hair from your backhand, and then cross it over to the front. It’s ok if you’re a bit slow. This starting point is usually the hardest part to get right.
Continue crisscrossing the sections
Once you get the initial crisscrossing movement down, give yourself a brief (and imaginary) pat
on the back. Then, continue the same movement – hopefully, getting a little better each time.
Separate out a small section from the front, weave it over the middle, and incorporate it into the
backhand section.
Then, do the same in reverse. Separate out a small section from the back, weave it over the middle, and join it into the front-hand section. If you find it getting loose, try to tighten it up because it’s far easier to loosen the braid at the end than to tighten it.
Consider flipping your braid over
If you’re getting the hang of the crisscrossing pattern, then continue doing that until you more or
less run out of hair. However, if you’re having trouble mastering the technique or want to try
something else out, then consider flipping your hair over.
This only really works once you’ve already created a certain amount of braid – roughly half or so. If that’s the case, then flip it over and follow the same pattern. Take out a small section from one side, cross it over to the other, and join it up.
Enjoy your fishtail braid
Regardless of whether you go the traditional route or decide to flip over your braid halfway through, make sure to stop a few inches before you run out of hair. Then, take a small elastic and tie together the end.

To create a fuller appearance, you can still pull apart the braids from either side. After that, you
can decide how to wear it. Most people go for a simple over-the-shoulder look, but you may want to center it in the back of your head.