Unlock Your Inner Artist: 40 Tips & Tricks to Make Painting Easier!
Say goodbye to dull walls and grudgingly painted ceilings – with just a few simple items from around the house, you can easily transform your humble abode into a masterpiece.
From an old tub of Vaseline to clever decorating hacks, learn how to unleash your inner artist with our 40 easy DIY tips!
The Easiest Way to Open That Stubborn Paint Can!
Are you stuck trying to open that pesky paint can? Don’t worry! YouTube’s Specific Love Creations channel has got you covered. According to the host, all you have to do is take a roll of tape, wedge it on top of the can, squeeze hard and give it a turn.
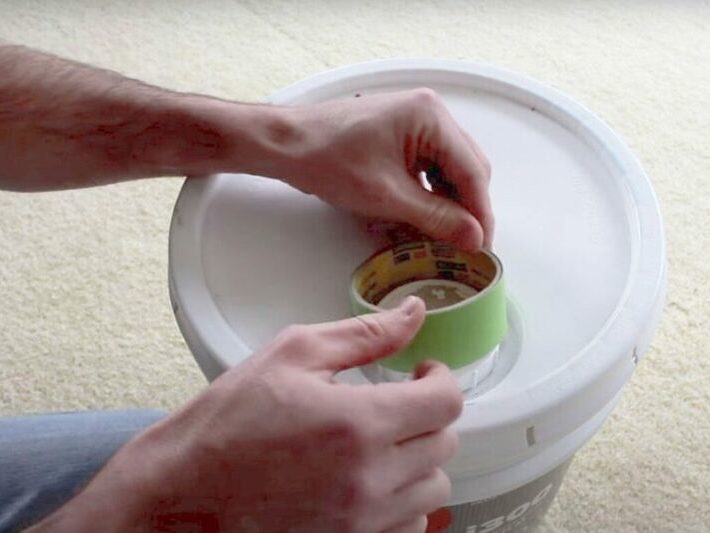
Source: YouTube/Specific Love Creations
Voila! The can will be open in no time. So, the next time you get frustrated with a stubborn paint can, just remember this handy hint.
Painting Projects Made Easier: Keep Your Roller Moist with this Simple Hack!
Are you working on a painting project that’s going to take more than a day? Don’t worry! We’ve got a quick and easy hack to keep your roller moist. All you need to do is securely wrap it in a plastic bag.
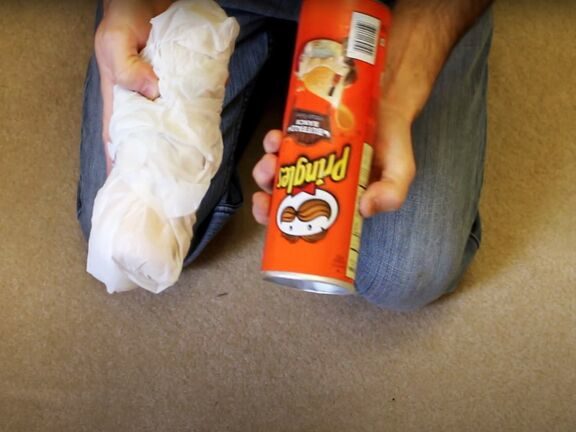
Source: YouTube/Specific Love Creations
For maximum protection, you can also put your roller in a Pringles container. This airtight storage will ensure that your roller stays in the best condition for your painting project!
Transform Your Walls with This Magical Trick
Transform your walls from dull to delightful with this magical trick! No need for wallpaper or expensive decorations; just a swatch of old lace and a loaded roller will do the trick. Secure the lace in the area you want to cover, then simply roll the loaded roller over it.
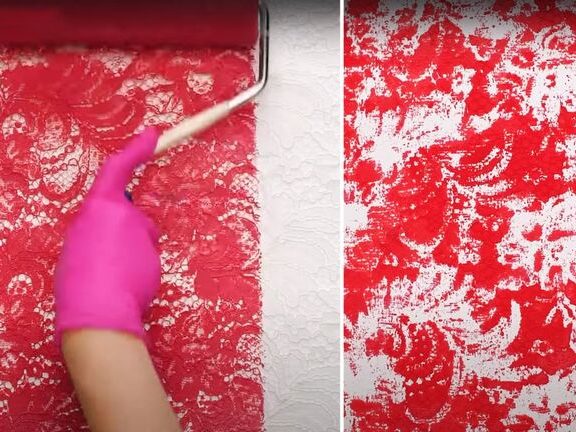
Source: YouTube/5-Minute Crafts
When you remove the lace, you’ll be left with a stunning pattern that will leave your guests in awe. Try it now and witness the amazing transformation for yourself!
Say Goodbye to Chipped Paint with a Hairdryer!
Want to paint a room without damaging the walls or baseboards? The answer is simple – use a hairdryer! Masking tape helps you paint neat lines, but can be a pain to remove.
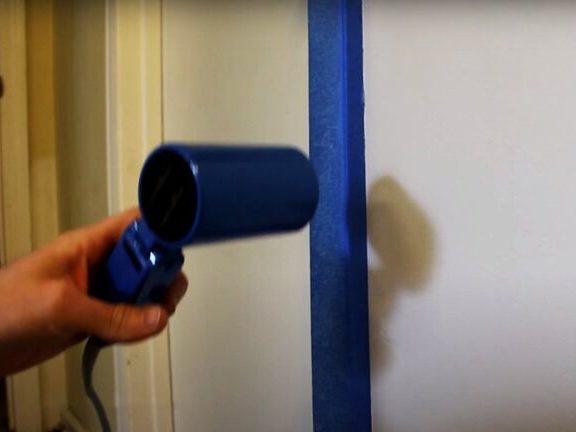
Source: YouTube/Specific Love Creations
To make it easy, power up a hairdryer and aim it over the section of tape you want to remove. This will help you avoid any unnecessary chips in your walls or baseboards. So, say goodbye to chipped paint and enjoy a neat and tidy paint job!
A Sweet Solution to Paint Fumes: Vanilla Extract to the Rescue!
Painting can be messy business and the smell can be downright unbearable. But with a little bit of vanilla extract, you can easily make the smell more bearable! Simply add one tablespoon of vanilla extract per pint of paint, and the offensive odors will be gone.
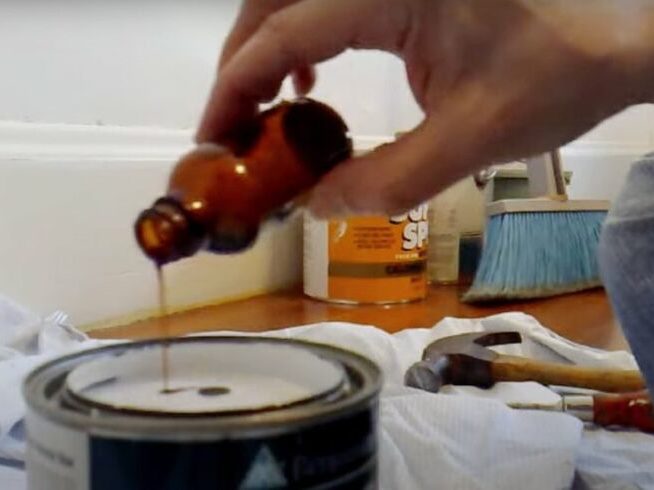
Source: YouTube/Steve Garfield
Plus, adding the extract won’t affect the finish of the paint. So don’t let the smell of paint ruin your project; use this sweet solution instead!
Create a Unique Wall in Just a Few Easy Steps!
Are you ready to add a one-of-a-kind statement to your room? This simple DIY design could be just what you’re looking for. All it takes is a couple of coats of paint, some plastic wrap, and a little pressure.
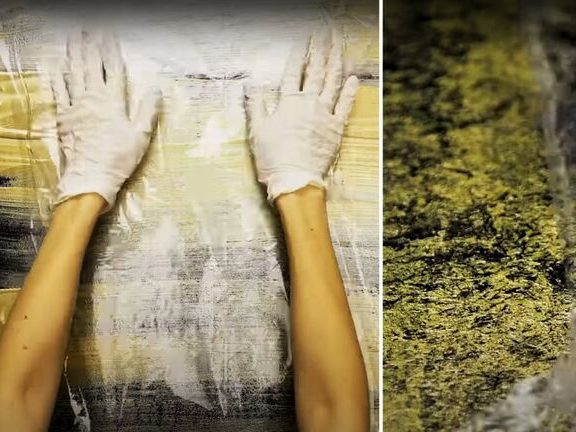
Source: YouTube/5-Minute Crafts
First, apply a darker shade to the wall and let it dry. Then, use a lighter color to brush on a few strokes. After that, add the plastic wrap, press firmly, and peel off – revealing your amazing new wall!
Make Painting Easier with Cardboard and Tape
Painting around the house can be a hassle and drop cloths are essential when doing major paint jobs, but folding them back up can be a real chore. The good news is that you can make the task a lot easier by sticking some cardboard to the edges with tape.
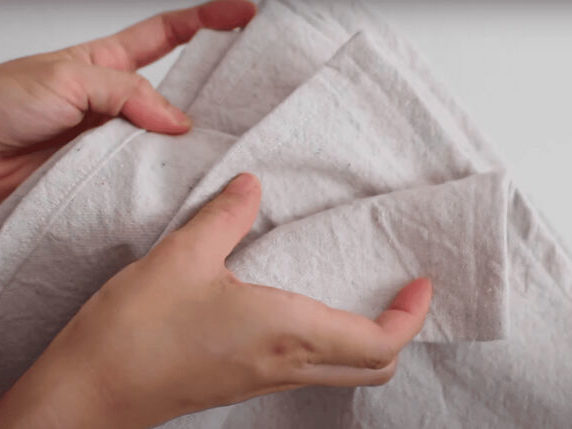
Source: YouTube/createwithjenn
This will not only make folding them back up simpler but also make dragging them between rooms much less stressful. With just these few simple steps, you can make your painting job stress free and much more enjoyable.
Create Cool Wall Art with Ice Cubes!
Bring some creativity to your walls without breaking the bank with this cool trick! All you need is some paint, a paint tray and a container of ice cubes. Pour the paint into the tray and dip the cold cubes in the mixture before pressing them against the wall – repeat as many times as you like!
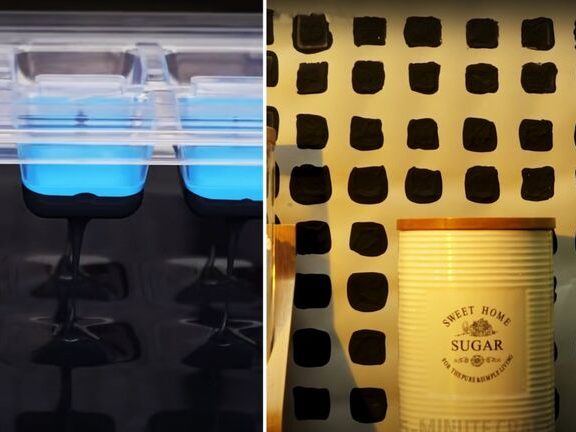
Source: YouTube/5-Minute Crafts
You’ll be left with an awesome design that’ll add a funky touch to your home. Give it a try and let your walls take on a cool new look!
A Simple Yet Effective Trick to Become the Master of Masking Tape!
Tired of constantly misplacing your masking tape while painting? Here’s the perfect solution for you! Transform your arm into a makeshift masking tape dispenser! All you need is an old sock and you’re good to go.
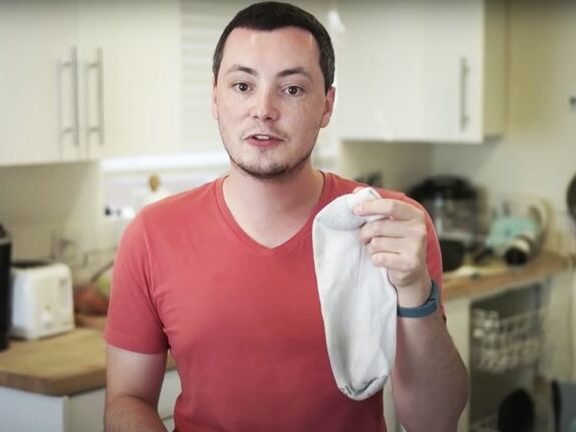
Source: YouTube/Lifehacker
Simply slide the sock over your forearm, insert the roll of tape, and you’re ready to get creative and tear off pieces of tape when needed. For a pro tip, fold over the end of the tape and you’ll never have to worry about unwinding it again! So, why not give it a try and become the master of masking tape?
Get Ready for a Home Makeover with a Swiffer Mop!
Ready to give your home a makeover? Start by prepping your walls with a Swiffer mop! A quick spritz of water and a few swipes of the mop will help you get your walls squeaky clean, creating the perfect canvas for a stunning transformation.
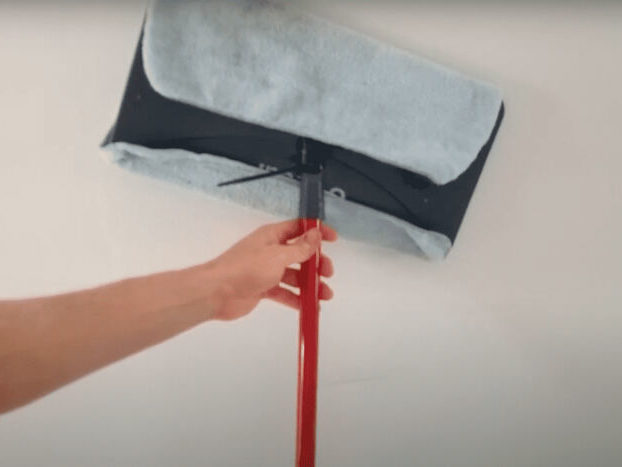
Source: YouTube/Game of Life
With a Swiffer mop, you can quickly and easily make your home look brand new. So what are you waiting for? Get your Swiffer mop ready and start to create a beautiful home!
Painting Made Easy - Even in those Hard to Reach Places
Painting can be easy with the right amount of space, but when it’s a tight squeeze, like behind a toilet or in a corner, it can be a challenge.
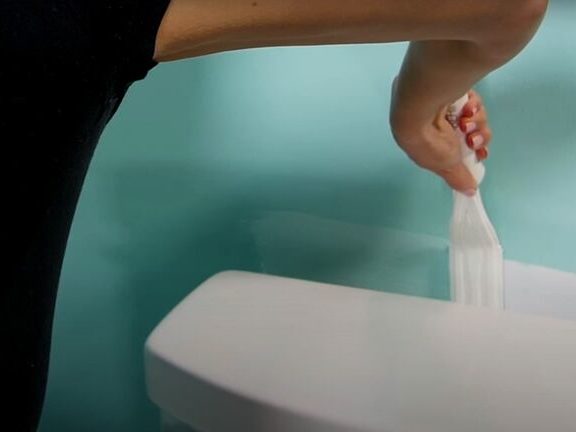
Source: YouTube/Paint Behind
Don’t worry! Just attach a paint pad to a handle and you’ll be able to reach every corner and crevice with ease. Now all those hard to reach places won’t be an issue anymore. So, when you need to paint those tight spaces, don’t forget to grab a handle and a paint pad, then you’re off to go!
Add a Touch of Rustic Charm to Your Home with an Exposed Brick Wall!
Transform your home into a rustic country paradise with a unique exposed brick wall pattern. All you need is a sponge, some orange paint and a bit of creativity! Start by trimming the sponge to your desired size, then dip it into the paint mixture.
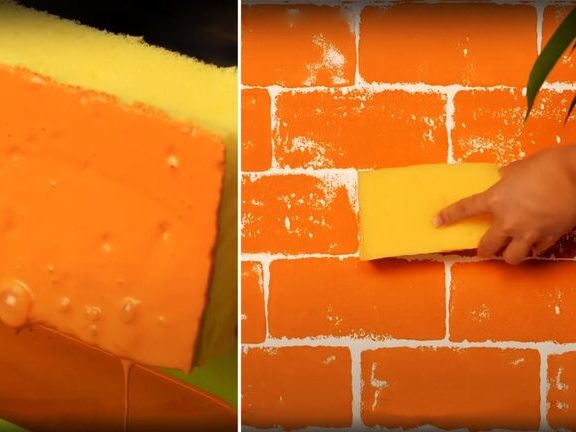
Source: YouTube/5-Minute Crafts
Apply on the walls and you’ll be amazed by the results! Imagine the warm, cozy ambience you can create with a charming exposed brick wall. Try it today and get ready to be impressed!
Avoid the Mess: How to Close a Paint Lid Effectively
Closing a paint lid can be tricky – one wrong tap and you’re left dealing with a mess. However, with some preparation, you can keep the paint where you want it. To avoid the mess, use an old rag or towel to cover the lid before you give it a firm tap.
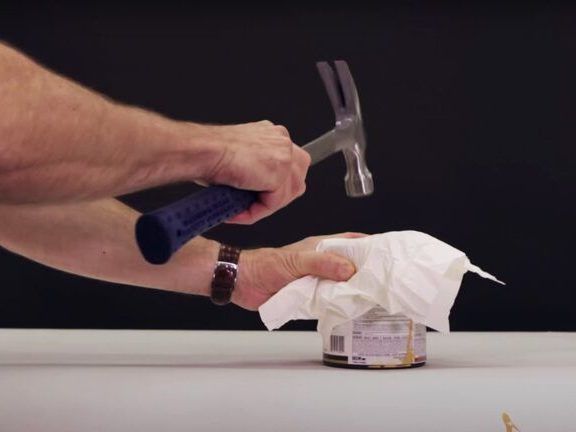
Source: YouTube/Popular Mechanics
This prevents the paint from shooting out of the can and saves you from a lot of hassle. So, next time you’re dealing with a paint lid, remember to wrap it up first!
Revive Your Furniture with This Simple Trick!
Bring your furniture back to life with this easy trick! Have an old chair that needs a new look? Before you paint it, place a few nails into the base of the chair to raise it above the floor.
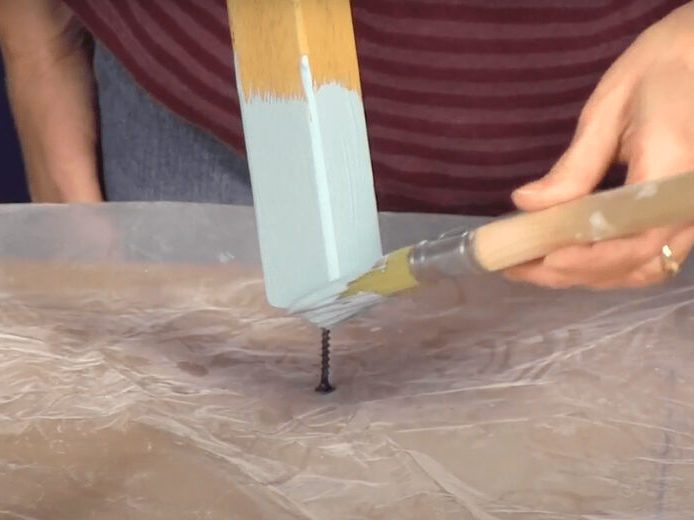
Source: YouTube/Family Handyman
Doing this will ensure that the chair legs don’t cling to the surface below and you don’t forget to paint the bottom of the feet. With this simple trick, you can bring that tired old chair back to life in no time!
Get Rid of Those Pesky Streaks & Drips!
No more stressing over pesky streaks and drips on your painted wall! Fixing this issue is easier than you think. All you need to do is sand the area carefully, if that fails, use a razor blade to gently slice the marks.
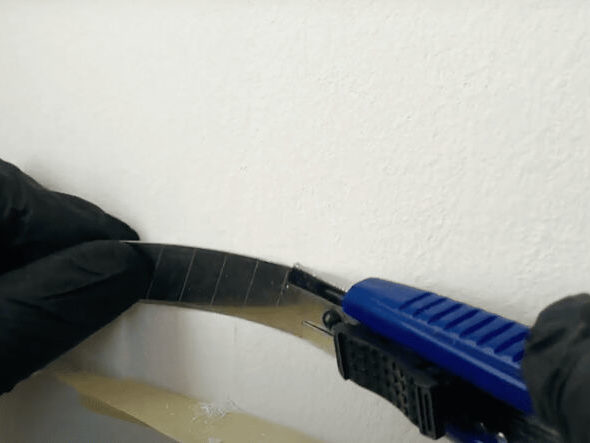
Source: YouTube/Hannibal Lectorr
Unorthodox as it may seem, it’s the best way to have your wall looking spotless again in no time. So avoid the stress and take action into your own hands to get your walls looking perfect once more.
Make Cleaning Paint Brushes Easier with Vinegar!
Are you sick and tired of spending hours scrubbing paint brushes clean? Well, we have a revolutionary solution for you – vinegar! All you have to do is soak your painting tools in vinegar and the paint will come off in no time.
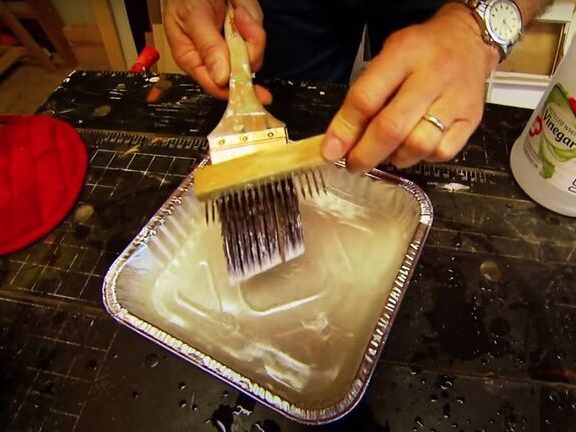
Source: YouTube/Today's Homeowner with Danny Lipford
Not only does this save time, but it also saves money. Say goodbye to tedious brush cleaning routines and embrace the power of vinegar to make your life easier!
Create Your Perfect Paint Tray with a Milk Jug!
Stop lugging around a bulky painting tray and try out this creative invention! The Specific Love Creations host has the perfect solution – a milk jug. All you need to do is cut off the front half to create a great area to store your paint.
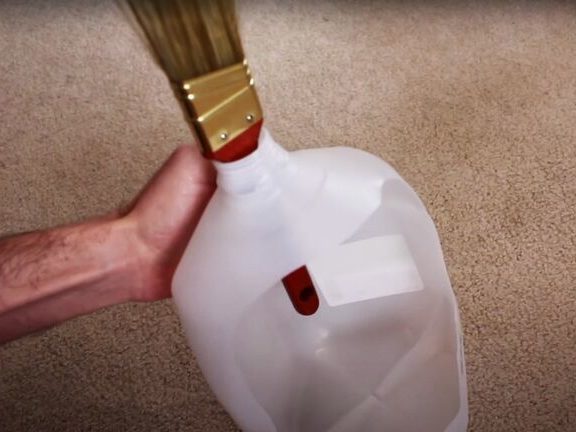
Source: YouTube/Specific Love Creations
Plus, you can stick your brush in the hole at the top. It’s the perfect space-saving and cost-effective paint tray. Get creative and have fun painting with this easy-to-make invention!
Smoothen Your Paintwork with Just a Brown Bag!
Transform your dull and rough paintwork effortlessly with just a brown paper bag! Even if you have all the decorating tools and gizmos, using a brown bag is the easiest way to make your paint feel smooth and velvety.
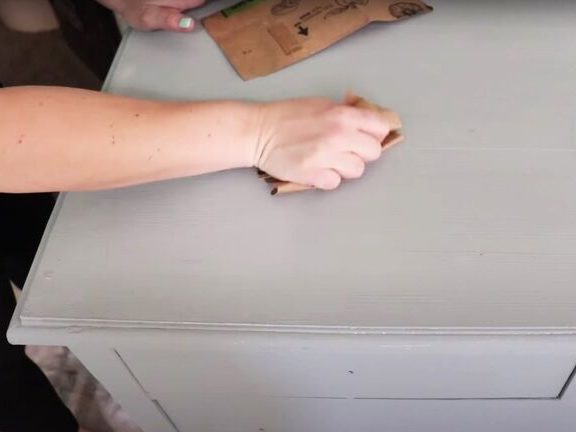
Source: YouTube/Jami Ray Vintage
Simply run the bag across the patchy area and watch as the roughness disappears. Say goodbye to the roughness and hello to a sleek finish – with just a brown paper bag!
Keep Your Paint Brushes Safe and Dry with a Pool Noodle!
Transform an ordinary pool noodle into a convenient paint brush holder in no time! With just a few simple slices and clips, you can create the perfect tool to prevent your brushes from becoming submerged in paint.
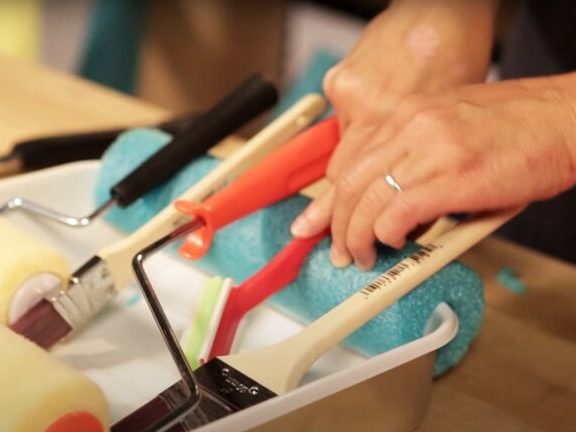
Source: YouTube/Yahoo
First, cut all the way along the pool noodle, then, prop it around the bottom of the paint tray. Make incisions along the noodle to fit your brushes and Voila! This quick and easy hack is the perfect way to make painting jobs more efficient and enjoyable. So don’t forget to grab a pool noodle the next time you’re tackling a painting project!
Keep Your Windows Clean While Painting
Painting can be a challenging task, especially when you are trying to be careful around windows. But don’t worry, we’ve got you covered! Before getting started, just grab some lip balm and apply it to the areas of the window that are most prone to paint stains.
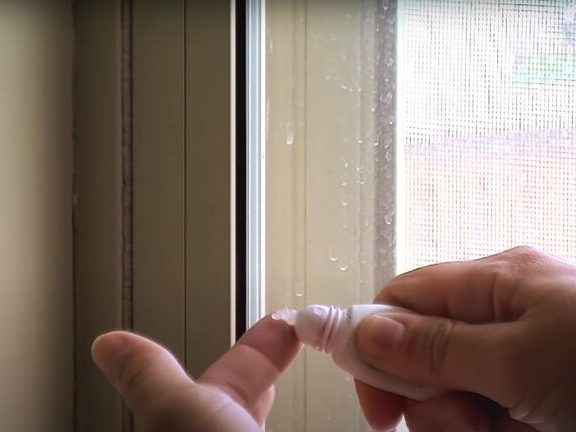
Source: YouTube/ehowathomechannel
The lip balm will act as a shield and help protect the window from any paint that may accidentally get on it. After you are finished painting, the paint can be easily wiped away! Keep your windows clean while painting with this simple and effective trick.
Transform Your Living Space in Seconds!
Want to add a classic stripe pattern to your walls without the hassle of wallpaper? We have the perfect solution for you! All you need is four pieces of insulating tape, a roller and some paint.
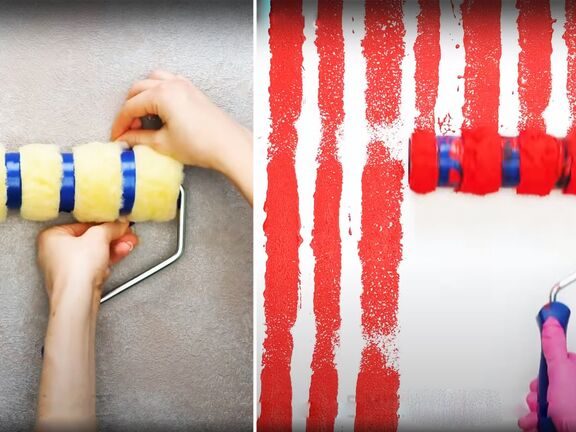
Source: YouTube/5-Minute Crafts
Wrap the tape around the roller, dip it in the paint and apply – you’ll be amazed at the transformation! In just a few seconds, your walls will come to life with a timeless, stylish and easy to do pattern.
Get the Perfect Finish with a Smaller Roller
Say goodbye to patchy walls and uneven finishes! If you’re looking for a smooth, professional finish every time, the secret to success is a smaller roller. With soft material wrapped around the end, you can get into all those hard-to-reach spaces, ensuring a seamless finish.
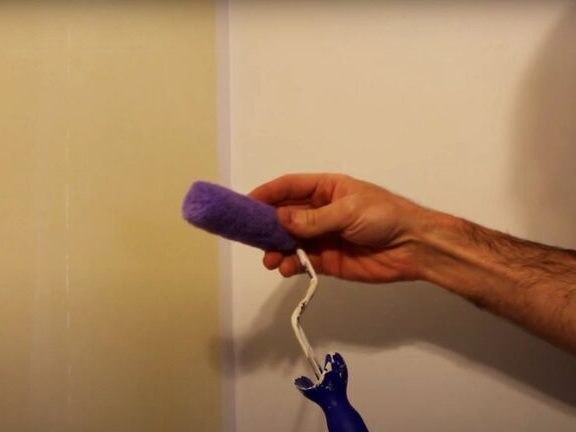
Source: YouTube/Specific Love Creations
For larger areas, a larger roller is still the ideal choice for a quick and easy job. So, whatever your wall painting needs are, make sure to have both a smaller and larger roller to get the job done!
Unleash Your Creativity with Masking Tape!
Love to get creative with your painting? Masking tape is the perfect tool for you! With just a few pieces of tape, you can create unique and precisely patterned walls. All you have to do is draw up the design and then run your roller over the top.
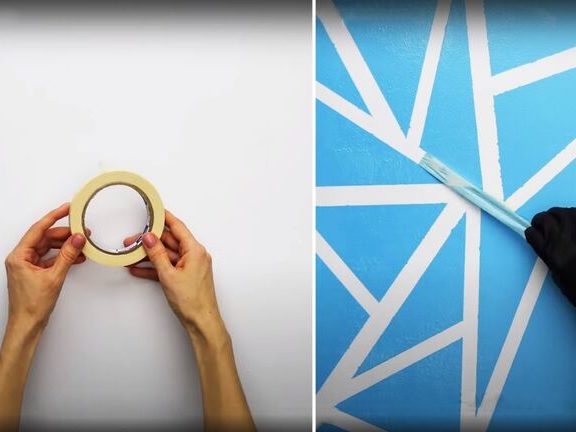
Source: YouTube/5-Minute Crafts
After the paint dries, simply peel off the tape and voila! You’ll have a stunning pattern that is sure to make any room stand out. So grab some tape and start exploring your creativity today!
Revamp Your Walls in an Easy and Affordable Way
Transform your walls in an easy and affordable way with just an old rag and some paint. Grab a cloth and twist it into a sausage shape, then dip it into a paint tray.
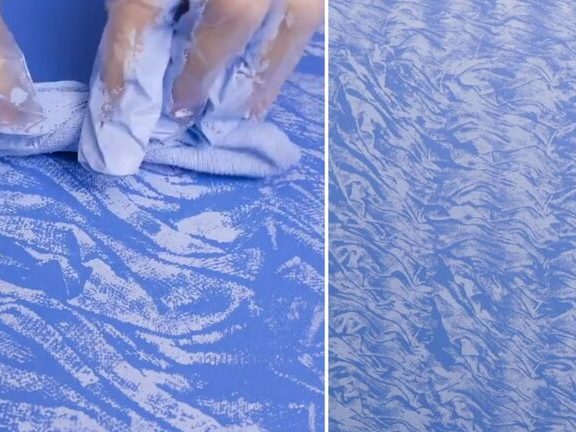
Source: Facebook/5-Minute Crafts Teens
Roll this down your chosen area for a unique and expensive-looking design that’s sure to turn heads. No more sifting through endless wallpaper samples; this simple DIY trick will have your walls looking great in no time.
Protect Your Brushes with a Simple Trick!
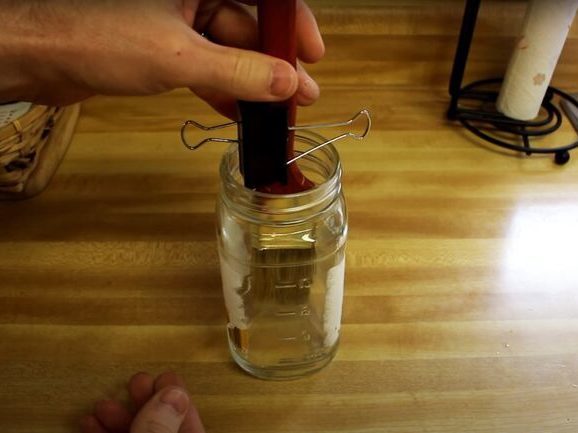
Battling against dirt and grime with a brush can be quite a tedious task. Did you know that your cleaning method might in fact be damaging your brush? According to the Youtuber Specific Love Creations, simply placing your brush in a jar can deform its bristles, particularly if they are soft. Fortunately, there’s an easy way to prevent this.
Source: YouTube/Specific Love Creations
All you need to do is attach a binder clip to your brush handle, so it can dangle in the cleaning solution without pressing against the bottom of the container. Keep your brushes well-maintained and in perfect condition with this simple DIY trick!
Unlocking the Power of Vinegar to Prep Your Surface for Painting
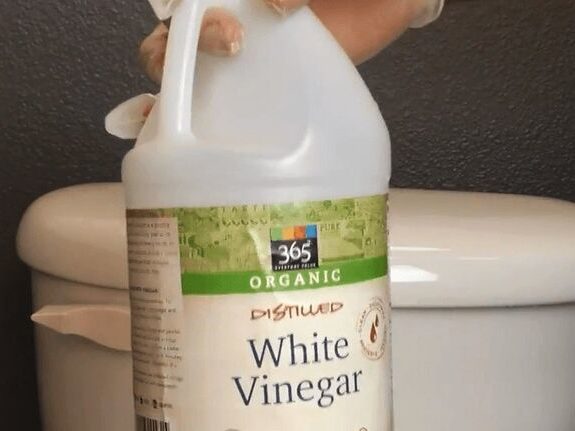
Preparing a surface for painting can be a tricky business, especially when it comes to concrete. To ensure that your paint won’t crack or split, try this simple solution: white vinegar!
Source: YouTube/HouseholdHacker
Applying a light coat of vinegar to the area you wish to paint will help prevent any peeling or splitting. With this one kitchen staple, you can tackle any painting project with ease. So don’t hesitate – unlock the power of vinegar and get your surface ready for painting!
Revamp Your Room in Minutes
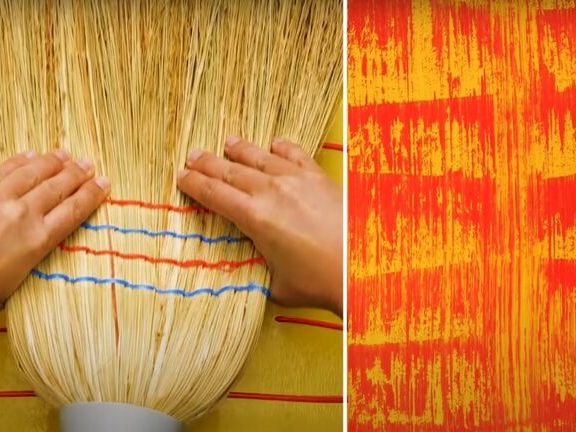
Do you want to create an eye-catching look for your room in a jiffy? Then try this simple yet effective design idea that will bring any room to life. Start by coating your chosen area with a base color using a roller.
Source; YouTube/5-Minute Crafts
Then, squirt a different but complementary shade in wavy lines across the surface. Finally, use a broom to wipe the paint down the wall and you’re done! You’ll surely have guests feeling envious with your stunning new look!
Create Cool Patterns with Just Three Colors and a Roller!
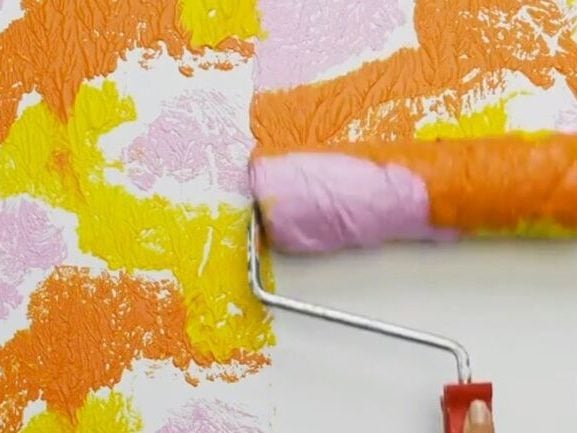
Painting a wall with a single color requires effort, but imagine having to use three colors at the same time! It might sound impossible, but with a little bit of creativity, it is more than possible. All you need is a roller, a plastic bag and an elastic band.
Source: Facebook/5-Minute Crafts Teens
Wrap your roller in the plastic bag and secure it with the elastic band. Then, pour the three colors into your paint tray, dip the roller, and roll them onto the wall. You’ll end up with a unique multicolored patterned effect.
A Simple Trick to Reuse Paint and Save the Planet
After a long day of painting, it’s natural to reach for the tap and rinse your roller. But before you do, here’s a trick to save both money and the environment. Take a putty knife and scrape any excess paint off the roller back into the container.
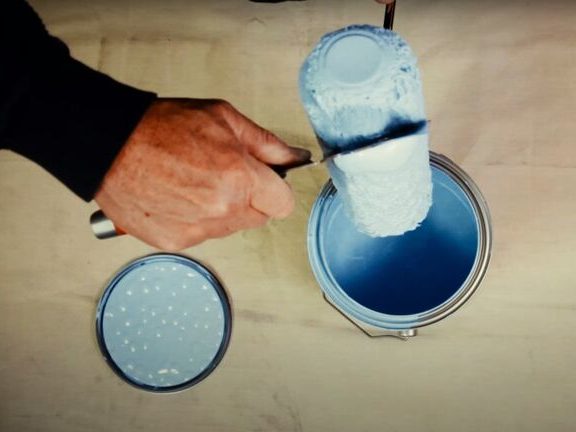
Source: YouTube/Dunn-Edwards Paints
You’ll have a little extra paint next time you need it, and fewer chemicals will end up in the drain. It’s an easy way to help the planet and your wallet!
Never Forget Your Paint Color Again!
Painting your walls is a great way to spruce up any room, but trying to remember the exact shade of paint you used can be tricky. Here’s a smart tip to make sure you never forget it again: write the paint name on a piece of paper and stick it behind your faceplates.
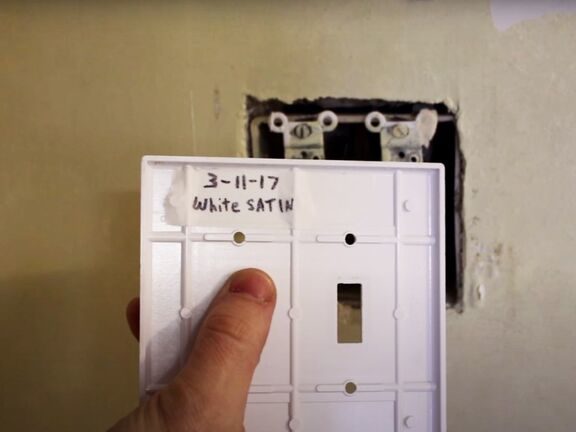
Source: YouTube/Specific Love Creations
This way, you’ll always have the exact paint color on hand whenever you need it. No more searching through color charts – you can thank us later!
Get the Perfect Finish - Use the W Pattern!
Have you ever used a roller to paint? If so, then you probably know of the W pattern technique. This simple trick will make sure your paint is applied evenly and can even save you from having to apply a third coat.
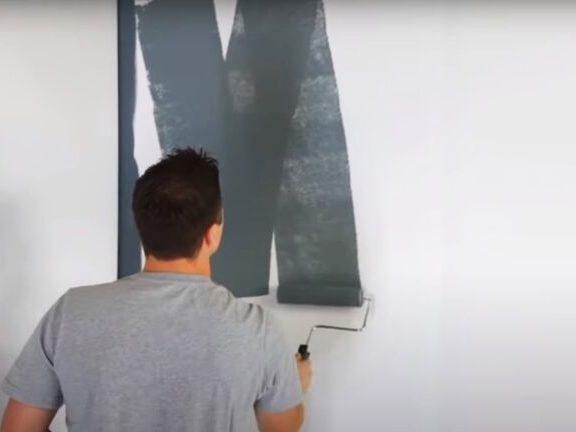
Source: YouTube/CILPaint
All you have to do is roll the paint in the shape of a W and enjoy the perfect finish. Try it today and make your painting job easier!
Make Cleaning Brushes Easier with Fabric Softener
Rather than using harsh chemicals to clean your brushes, why not try something gentler? Fabric softener can be an effective way to clean your painting tools and make them soft for a smoother paint job.
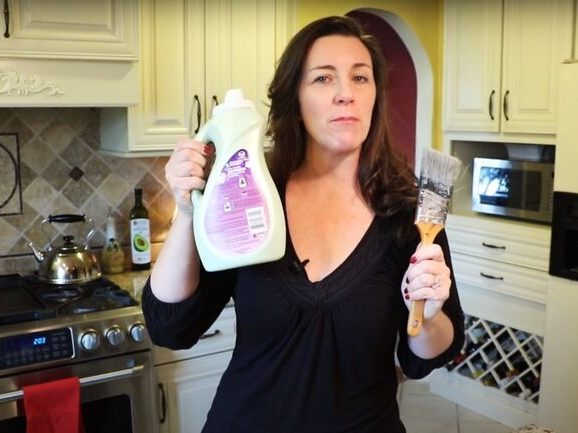
Source: YouTube/DIYHIPChicks
Soak your brushes in a solution of fabric softener for a few hours and you’ll find that your brushes will be noticeably softer and your paint job will come out looking great! Plus, you won’t have to worry about any stinky chemicals giving you a headache. Cleaning brushes has never been easier!
Get Creative Without the Mess: Use Vaseline to Paint with Ease!
Don’t let messy walls ruin your creative streak! With Vaseline, you can get creative and paint away without worrying about paint sticking to the wrong places. Simply apply the lubricant to any surface you want to avoid painting, and watch as the decorative coating slides off with ease.
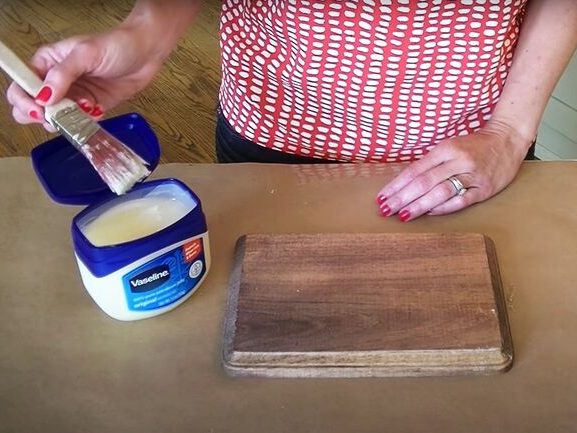
Source: YouTube/Unexpected Elegance
When you’re done just remember to wipe the Vaseline away! With this helpful hack you can add a personal touch to your home without any of the hassle.
Unleash Your Inner Artist with Just One Color and a Comb
Transform your walls from plain to captivating with just one color and a comb! With a bit of paint, a spare hair comb and some creative energy, you can create a stunning pattern in no time.
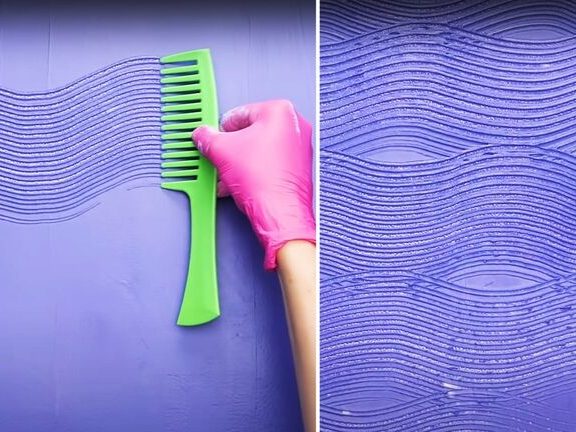
Source: YouTube/5-Minute Crafts
Simply coat the wall with your chosen paint, grab the comb and push the tooth end into the wall while it’s drying. Then, drag the teeth along in a swirling motion and watch as beautiful waves appear. Go ahead, unleash your inner artist and enjoy the stylish results!
Keep Your Paint Fresh with this Simple Trick
Discovering a can of hardened paint can be a real bummer. But with this hack from professional contractor Joe Truini, you can make sure your paint stays in peak condition for much longer.
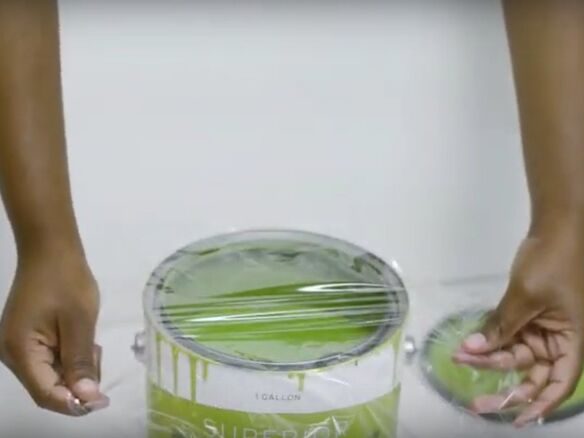
Source: YouTube/PaintCare
All you need is some food wrap: place it on the top of the open can to seal out as much air as possible before closing the can. This will keep your paint from hardening and make sure it’s good as new the next time you need it!
Pre-Painting Prep 101: Run Your Rollers Under Hot Water!
Are you planning to give your home a makeover? Before you pick up that paintbrush, there’s one important step you shouldn’t miss – prepare your rollers! This simple task can make all the difference in the quality of your paint job. Simply run them under hot water for a few minutes to get them ready for painting.
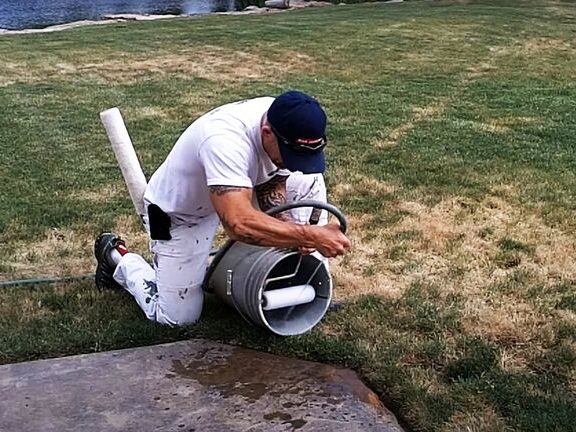
Source: YouTube/Paint Life TV
Not only will this help the paint stick, but you’ll also achieve a more professional-looking finish. So, when it comes to your next home painting project, don’t forget the power of pre-painting prep!
The Secret to Cleaning Fuzzed-Up Rollers
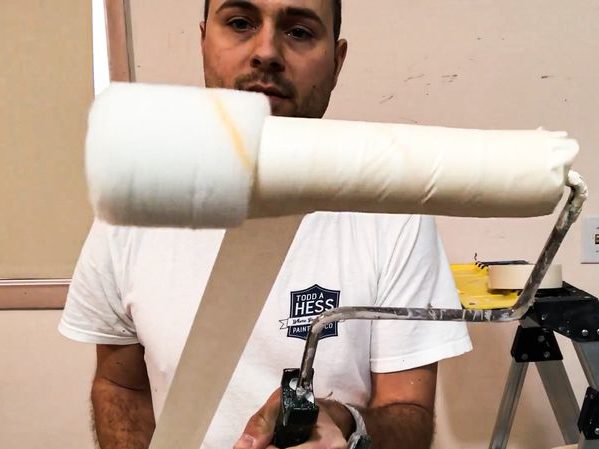
No homeowner wants to deal with the pesky fuzz that can get into every nook and cranny. Unfortunately, this includes rollers! But don’t worry, there’s a simple and effective way to get rid of the fuzz: packaging tape.
Source: Todd A Hess Painting Co/YouTube
Running the roller across a sticky strip or two of tape will quickly and efficiently clean off all the fluff. So if you want to keep your rollers looking pristine, don’t forget this handy trick!
Keep Paint off the Floor with this Simple Trick
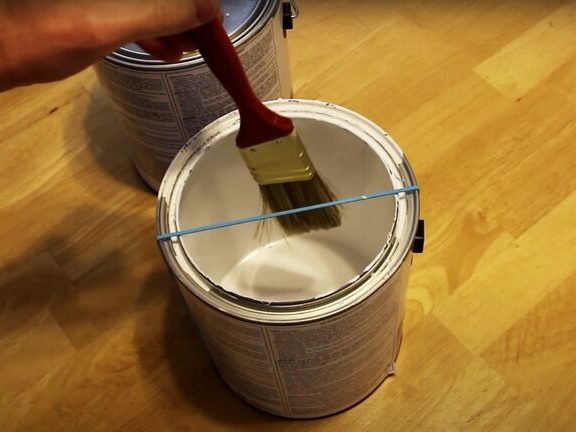
The ultimate painting hack is here! Save yourself from a world of mess and stress with this simple rubber band trick. All you have to do is stretch a rubber band around your paint can, and you can use it to wipe the excess paint off your brush before you start painting.
Source: YouTube/Specific Love Creations
No more mess on the floor or around the lid of the paint can – this trick truly is a lifesaver!
Create a Unique Pattern With Corn on the Cob!
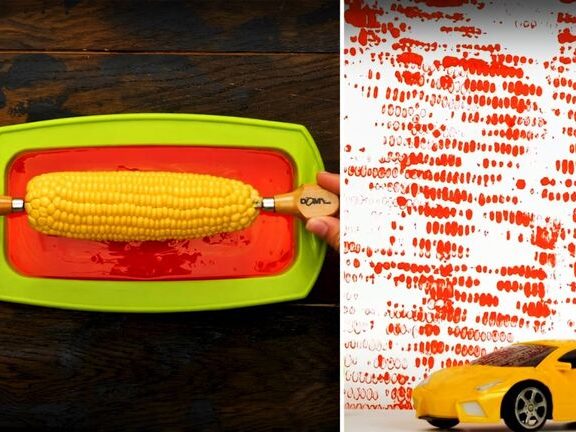
Transform your walls into a work of art with a fun and creative painting tool – Corn on the Cob! Not only is it an inexpensive and accessible way to get creative, but you can also achieve a unique pattern that will make your room really stand out.
Source: YouTube/5-Minute Crafts
All you need to do is pierce the ends of the corn with a couple of screwdrivers before coating it in paint, and then apply! So why not give it a go and explore a new and exciting way to paint?
Keep Your Paint Tray Clean and Mess-Free!
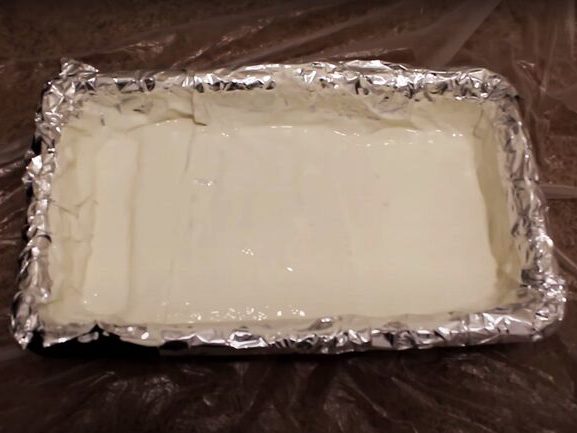
Tired of dealing with a mess after painting? We have the perfect solution for you! All you need to do is wrap your paint tray in kitchen foil or a plastic bag. This layer of protection will stop paint from staining the surface of the tray and make it easier to clean.
Source: YouTube/Specific Love Creations
No more fuss and no more mess! So get your paint tray prepped for your next painting project and enjoy the convenience of a clean and mess-free tray.
